Showing posts with label Home decor. Show all posts

DIY: Gallery Wall

April 22, 2014

Gallery walls seem to be a thing right now, and that is perfectly okay with me. I had a small scale one in my last apartment, but was super excited when I saw this big open wall in my new apartment. I knew instantly what was going to go up. A gallery wall is a fun way to make a big impact and totally customize it. Every time a new person comes over, they go straight to this wall and look at all the different things I have hanging up. I love that my gallery wall reflects me. I especially love that I was able to incorporate some special pieces from our trip to Europe. We acquired two small hand painted paintings from local artists in Rome, and two prints of paintings from Paris. Other things incorporated into my gallery wall are a few of my favorite art prints, photographs and a few quick DIY projects thrown in.  
There are a lot of tips and tricks floating around the inter-webs for hanging up multiple frames in the form of a gallery wall. I just usually measure out the width, or height, of my wall space (which every I am more constrained by) and then leave the tape measure locked at that measurement on the floor. I just start arranging and rearranging my frames until I find a combination that works for me. From there I have my handy man hang everything up. He does a good job and does the job in about half the time it would take me.

  1. Shopping Bag, from Laduree
  2. This is your life Canvas print, by Louise Carey
  3. Silhouette wall hanging DIY
  4. Buildings of Paris print, by City Fabric
  5. Be You Print, by Sugar Paper
  6. DIY Paper mache letter with turquoise paint
     * Personal pictures I had printed.
     ! Paintings and prints we picked up from our travels to Europe.
As far as frames, I have accumulated many of them over time. Some from IKEA and Target and others from places like Marshalls and TJ Maxx.  I love that there is a mix of frames too. I know my mom and grandma would have a fit that the frames don't all match, but I think that's what I like most about my gallery wall.

Here are some of my favorite frames: Target 1 / Target 2 / IKEA 1 / IKEA 2 / IKEA 3 / IKEA 4 / IKEA 5
I think my love of Paris is pretty evident from my gallery wall alone; my biggest art print is of Paris, I have 2 pictures of the Eiffel tower, 1 art print of the Champs-Élysées, and the most adorable shopping bag we got with our macaroons from Laduree.  One day we will make it back. In the mean time, I'll enjoy looking at the momentos in my gallery wall.

PS: Coffee table DIY post will be up next week!

DIY: IKEA hack campaign dressers

March 4, 2014


If you know me, you know that I have a very distinct style when it comes to decorating, and it even spills over into my wardrobe. I am very traditional and classic when it comes to my design style. Lots of black and white, with some clean stripes and polka dots mixed in. Very traditional. So these emerald green bed side tables seemed completely out of my element, but it was something I didn't have to think twice about. When I saw this DIY floating around pinterest, I knew it was a must in my apartment. And, with the black and white theme I have going on-it's very easy to add pops of color.


Materials:

I found inspiration through these other DIY's: DIY 1 // DIY 2

Instructions:
  • Once you have your IKEA Rast Dresser, first thing you will want to do is fill the holes with wood putty where you would have put the knobs that came with the dresser. Let dry.
  • Once the wood putty has dried, sand over each spot to make it flush with the rest of the wood.
  • Paint all the pieces, making sure to paint the 2 long side pieces since there will be overhang at the top. We made the mistake and had to add the paint once we assembled the dressers. 
  • Let the paint dry overnight.
  • Next, you're going to mark out where you will place your corner pieces. Place a corner piece on each of the drawer face corners and with a sharpie or pencil, place a dot in between the holes of the corner pieces. 
  • Drill out small pilot holes in order to ensure not to split the wood. 
  • Then drill out the holes slightly smaller then the screws. Make sure to screw in the screws slowly so you don't end up stripping the screw heads or splitting the wood.
  • Determine where you want your drawer pulls placed and mark out your drill marks for those as well. 
  • Drill small pilot holes here as well just like the corner pieces. Then drill out the holes slightly smaller then the screws.
    • Make sure the screws you have are short enough they don't go all the way through to the other side. 
  • Now to the hard part, decyphering the IKEA instructions to actually assemble the dresser!
    • Remember, you aren't going to make use of the knobs that came with the dresser.
We ended up doing two-one for each side of the bed, so all of our materials ended up being doubled. These are trendy, yet functional since you are able to use them as dressers and still small enough to double as side tables. These bed side tables are completely doable on a college students/newlyweds budget! And, as an added bonus-this DIY project didn't take us very long to complete-maybe a day and a half, painting included.

PS: I owe most of this DIY to my handyman. I'm really lucky to have him around to put up with my crazy DIY's! Love you T.


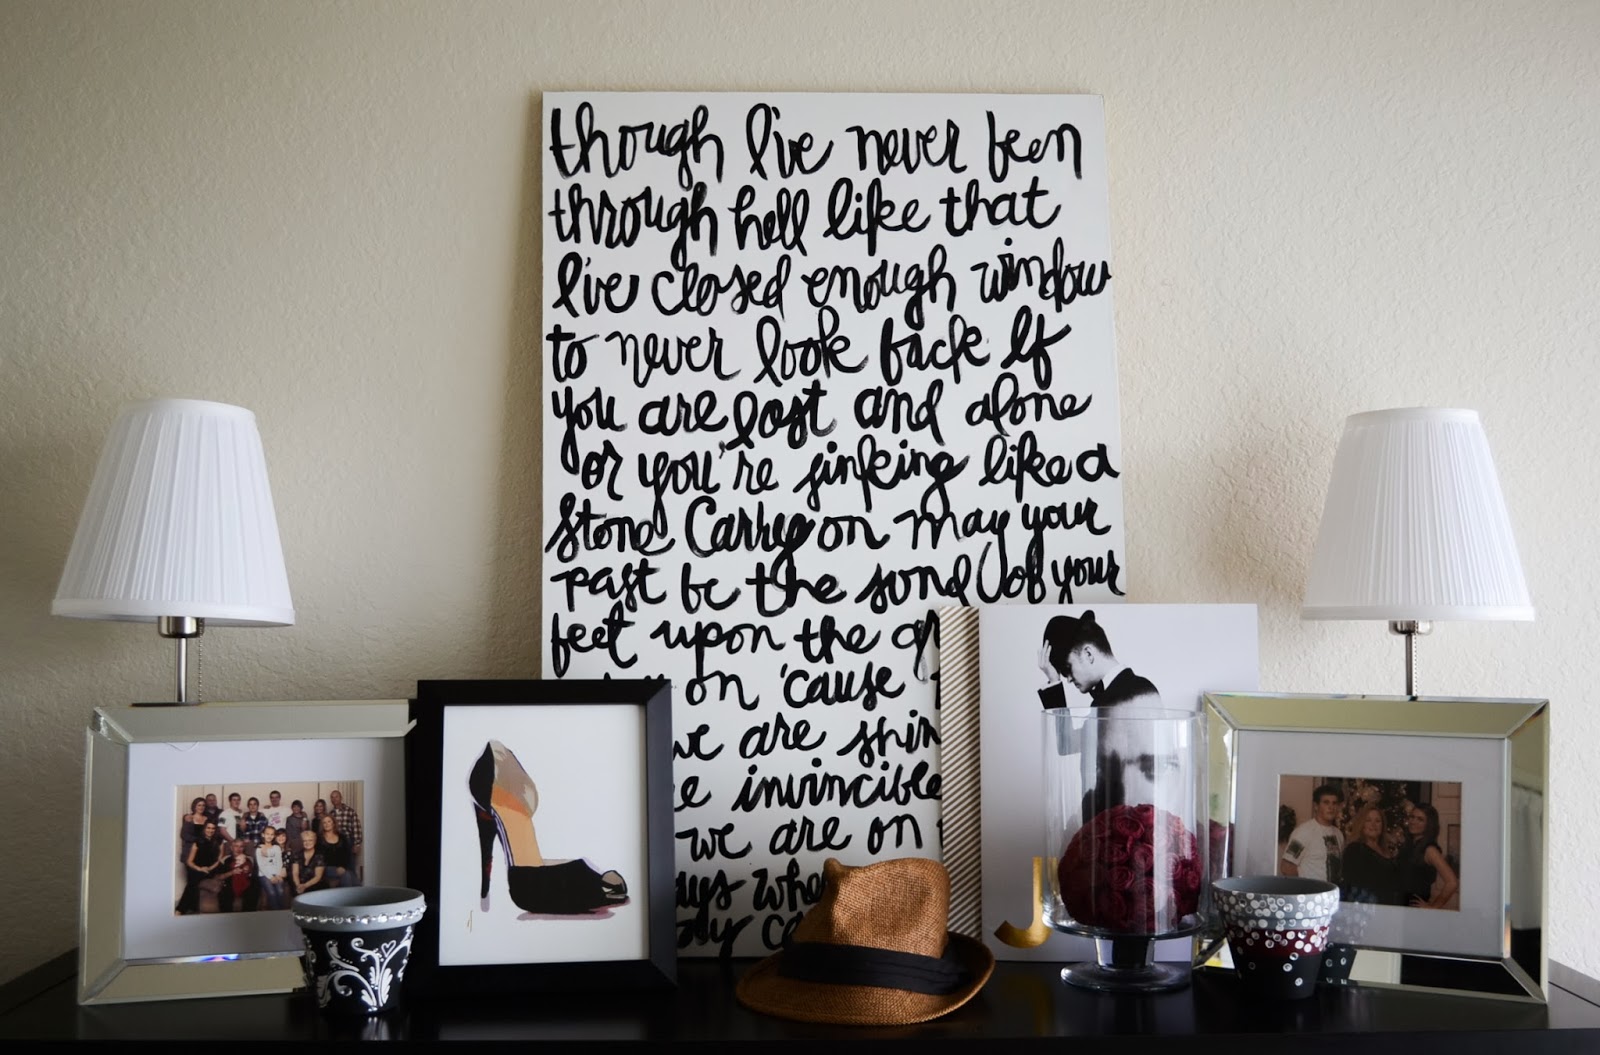
Scripted Art

February 19, 2014

 Completely 100% inspired by this amazing lady. The black and white hooked me and the script writing pushed me over. This was a fun project that I was able to complete in an afternoon-drying time and all. The hardest part was deciding which lyrics I wanted to display.

 I ended up choosing the chorus to Fun.'s "carry on." JT's Mirrors was a close second. Travis introduced me to Fun. before they became wildly popular. Their first CD is still my favorite but Carry on has to be my all time favorite Fun. song. I really like the lyrics of the song "if you're lost and alone, or you're sinking like a stone carry on." As a busy grad student, it's this line that reminds me to keep going. It's nice to have a visual reminder to "carry on" no matter how busy or crazy life may get.
First, I used white acrylic paint cover the entire canvas as a base coat. Once that dried I went to town on the script not worrying about completely filling in the letters with paint. I went back over the letters a second time, not being extremely careful about getting inside the lines.

As an added flair, I decided to paint the edges of the canvas with my favorite gold acrylic paint. Although you can't see it looking straight on, I think it gives it a little something extra. Once the paint dried, I placed it on top of my bookshelf anxious to see how it would fit in, with ambitions to hang it up, but I kinda like it leaning against the wall.
Definitely an easier project that makes a huge impact on an otherwise blank wall!

DIY Lighted Letters

January 22, 2014


This is a DIY I've had on my never ending want-to-DIY list for quite a while. I saw the tutorial from the a beautiful mess girls and I knew I had to crank mine out. This project came together fairly easy, in an afternoon with the help of Travis. I rushed out to get the letters to spell "JOY," but they didn't have the complete set. I was bummed but then Travis reminded me I had the exact letters I needed in storage! Originally, I bought these letters from JoAnns for a DIY Anthro knock off project, but since they were just collecting dust, I figured I would re purpose them! 
First, with a pencil, I marked out where I wanted to drill the holes for the lights and then when I was sure of the spots, I marked it with a sharpie. I didn't worry about the sharpie marks because I knew I was going to be painting over them later. My handy man then drilled out the holes for me. He chose a drill that was a little smaller than the lights so that the lights would fit snug in there.  Next, because the letters were enclosed, we took the backs off to expose the holes. This is when I decided to paint the letters a Martha Stewart acrylic gold. They took about two coats of paint and they dried fairly quick.
 After the letters dried, we strung the string of lights through them, making sure we started at the bottom of each letter and ending back up at the bottom of the letter. We did this so we could string garland in front of the letters, when up on my mantel, and you couldn't see the string of lights going from one letter to the next. I kinda had to play with the excess string to get it to stay inside the letter. I didn't want to tape it down with electrical tape because I knew I wanted to disassemble this decoration for easier storage.
Pretty simple DIY that doesn't take much time but definitely makes a statement and can be done for any season!

PS: Check out the rest of my Christmas decor in this post!

Christmas Decorations 2013

December 18, 2013

This was the first year I was able to decorate my own space. It's really hard to get into the holiday spirit being a graduate student, because of the stresses of finals and projects that come with the end of the quarter. In the middle of finals week, Trav and I took a study break to go pick out a tree. This was the first year we picked out a tree that would be OURS. We brought it back and put lights on it. It stayed this way for awhile until we got around to actually decorating it. I had so many ideas flowing through my head for decorations I wanted to get done, thanks pinterest. This lit up JOY was probably my favorite project, and a DIY post on this will be up soon!
One of the projects I was really anxious to get done were these embroidery hoops. A quarter yard of two different types of flannel, cut to size, add pretty ribbon to the top and the white space between my fire place and mantel had a pretty (and cheap!) decoration to fill it.